Organization is essential to have a functional classroom and color coordination helps tremendously! Over the last few years, I have developed a system for color coordinating my classroom. It has allowed me to streamline my planning and helped me to organize my classroom in a way that makes sense to me and my students. There are a few main areas that are simple to color coordinate and see immediate results. This blog post is going to share tips on color coordinating your teacher materials.
This post contains some affiliate links to make your life easier! Any purchases made through one of these links earns us a small commission. at no extra cost to you. The commission helps to support the blog so we can continue to share content and freebies with you. All views and opinions are purely my own.
Subject Colors:
To start color coordination in your classroom, you have to begin by assigning the main subjects (or blocks that you teach if you are departmentalized). These colors are going to be seen throughout your classroom (both your materials and student materials), so be sure to pick colors that are easy. Don’t go crazy and pick indigo, fuchsia and mauve.
Here are the colors I use in my classroom:
Reading-Pink Math-Yellow Science-Green Social Studies-Orange
I also use the color blue for all the “other” areas of my day like snack, morning meeting, assemblies, etc. These basic colors are perfect and look great together!
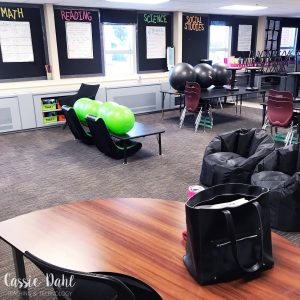
Bulletin Boards:
The first place you see these colors in my classroom is on my bulletin boards. I have cut out the title of each subject in the assigned color. I use these bulletin boards to hang vocabulary posters, student work in a subject area, and anchor charts.
Quick Standards Sheets:
Many districts require teachers to turn in lesson plans with standards listed. If not, teachers still need to have easy access to their standards to make sure that they are meeting state and district requirements with their instruction. When I first started teaching, I had the standards printed off and placed in the back of my lesson plan binder and also in a folder behind my desk.
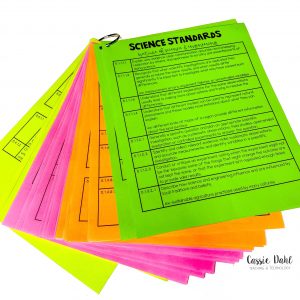
Not any more! I printed the standards on their assigned color paper and laminated them. A quick hole-punch in the corner with a ring and these standards are now hanging behind my teacher table, in an easy to access location. No more digging through binders and folders to find the standards.
Added bonus of having them laminated, I can use an expo marker to mark the standard with a check when I have taught and assessed it. It’s a great way to keep track throughout the year. At the end of the year, simply use some expo spray on a rag and wipe the checks off to reset for the next year.
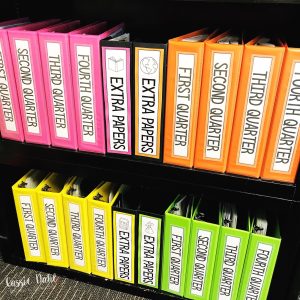
Binder System:
Hands down, this is my favorite part of my classroom. I purchased color binders from Amazon and Target for each of my subject areas. The binders I use are 2″, but any size would accomplish the same task. The ones I used can be found here and here.
Each subject area has four binders, one for each quarter. If your school year is broken into trimesters- simply use three binders for each subject.
The binders house all of my master copies. I use page protectors (grab them here) to keep my originals in. When I first started teaching, I used folders inside of filing cabinets and it was a hot mess. I couldn’t find anything I needed quickly. I would end up searching through my downloads on my laptop or back in my purchases on TpT to find what I was looking for.
Start with empty binders for the whole year when you first start setting this up. Then your first year of using the system, simply add your master copies as you go through the year. I add them in the order that activities were completed in my classroom. For example, the first few pages in each of the quarter one binders are what I do during the first few weeks of school in each subject.
Need a copy for a student because they having a missing assignment? You know just where to look. Another teacher asking you for a master copy of something you created together? You know just where to look. Principal asking for copies of what you taught last week? You know just where to look.
In future years, when you start lesson planning just get out the colored binder and the master copies are right there. No more digging through folders in massive filing cabinets.
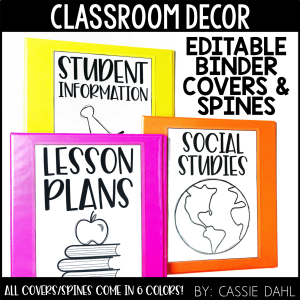
Want the binder covers/spines? Grab them below!
-
 $3.50
$3.50
Extra Copies Bins:
I don’t know about you, but I always print off a few more than my class size when I am making copies. Then I have an extra if a student messes up or if a page goes missing. Before I started color coordinating in my classroom, these extra copies would all end up in a big bin where I would waste precious minutes sorting through to find that one page I needed.
To remedy this problem, I purchased four magazine files (similar to these here) to store extra copies right next to my colored binders. My students even know where to look if they need an extra copy! As soon as I am finished handing out a page, I place the extra copies right in the bin. I don’t have extra copies floating around my classroom or all shoved into one bin.
I labeled the four bins with a binder spine from the same pack I shared above. They all match and they have a cohesive look behind my teacher table.
Daily Folders:
Being organized for daily instruction is important to keep my classroom routines running smoothly and keep our transition times to a minimum. Misbehavior tends to happen more frequently when teachers are searching for materials. That’s where my daily folders come in!
I have a colored folder for each day (of course they match my four subject colors). When I prep for my lessons, I prep multiple weeks at a time. All of my materials are stored in bins behind my teacher table. One of the last things I do before I leave my classroom for the day, I quickly put the copies in the daily folders for the next day.
This also makes it easy to prep for subs and I know that subs are thankful for having everything organized in folders for subjects. By making sure my copies are ready for the next day before I leave, my morning isn’t spent at the copy machine before students walk in the door.
I hope that these strategies help you streamline your classroom and help you get more organized. Please let me know if you have any questions! If you want to see more pictures of my classroom, follow me on Instagram by clicking here.